Welcome to the Singer Sewing Machine 1120 Manual, your comprehensive guide to unlocking the full potential of this versatile mechanical sewing machine. Designed for both beginners and experienced sewists, this manual provides detailed instructions to help you navigate setup, operation, and maintenance, ensuring professional-quality results for all your sewing projects.
Overview of the Singer 1120 Sewing Machine
The Singer 1120 is a versatile mechanical sewing machine designed for both beginners and experienced sewists. It features 10 built-in stitches, including essential and decorative options, perfect for a variety of sewing tasks. The machine is equipped with a front-loading bobbin system for easy thread management and an automatic 4-step buttonhole function, simplifying the creation of professional-looking buttonholes. Lightweight and compact, the Singer 1120 is ideal for household use, making it a reliable choice for basic stitching, mending, and creative projects. Its user-friendly design ensures smooth operation, catering to those seeking a straightforward yet efficient sewing experience.
Importance of the Manual for Proper Usage
The Singer 1120 manual is an essential guide for understanding and utilizing the sewing machine effectively. It provides detailed instructions for setting up, operating, and maintaining the machine, ensuring optimal performance. The manual covers safety precautions, threading processes, and troubleshooting common issues, making it indispensable for both beginners and experienced users. By following the manual, users can master the machine’s features, such as its built-in stitches and buttonhole functions, while also learning proper maintenance techniques to extend the machine’s lifespan and prevent operational errors.
Key Features of the Singer 1120 Sewing Machine
The Singer 1120 features 10 built-in stitches, an automatic 4-step buttonhole function, and a front-loading bobbin system. Its mechanical design offers simplicity and reliability for various sewing tasks.
Built-in Stitches and Their Functions
The Singer 1120 comes with 10 built-in stitches, offering versatility for various sewing tasks. These include essential straight stitches, zigzag stitches for elastic fabrics, and stretch stitches for knits. Additionally, decorative stitches allow for creative embellishments, while reinforced stitches ensure strong seams for heavy-duty projects. Each stitch type is clearly marked on the machine’s dial, making it easy to select the right one for your fabric and sewing needs.
The automatic 4-step buttonhole function is another standout feature, enabling precise and uniform buttonholes with minimal effort. This combination of stitches and functions makes the Singer 1120 ideal for both basic mending and complex sewing projects.
Front-Loading Bobbin System
The Singer 1120 features a convenient front-loading bobbin system, designed for easy access and straightforward setup. This system allows users to quickly install and remove the bobbin, reducing the risk of misalignment and ensuring smooth stitching. The front-loading design provides clear visibility, making it simpler to thread the bobbin correctly. This feature is particularly user-friendly for beginners, as it minimizes complications during the initial setup process. The manual includes step-by-step instructions to guide users through bobbin installation, ensuring a seamless sewing experience from the start.
Automatic 4-Step Buttonhole Function
The Singer 1120 Sewing Machine features an automatic 4-step buttonhole function, designed to simplify the process of creating professional-looking buttonholes. This convenient feature guides users through four easy steps, ensuring consistent and precise results. The machine automatically measures and sews buttonholes to the correct size, eliminating the need for manual adjustments. With its built-in sensor, the 1120 adapts to different fabric types, providing reliable performance. This function is a time-saver for sewists, allowing them to achieve flawless buttonholes with minimal effort. The manual provides clear instructions on how to utilize this feature effectively for various sewing projects.
Setting Up the Singer 1120 Sewing Machine
Setting up the Singer 1120 is straightforward. Unpack, inspect, and follow the manual for threading and bobbin installation. Ensure proper setup for smooth operation and ease of use.
Unpacking and Initial Inspection
When you receive your Singer 1120 sewing machine, carefully unpack it from the box. Ensure all accessories, such as the presser foot, bobbin, and power cord, are included. Inspect the machine for any visible damage or defects. Check the stitch panel, bobbin area, and needle bar to ensure they are clean and free from debris. Familiarize yourself with the machine’s components by referring to the manual’s diagrams. This initial inspection helps verify that your machine is ready for proper setup and use, ensuring a smooth sewing experience.
Threading the Machine
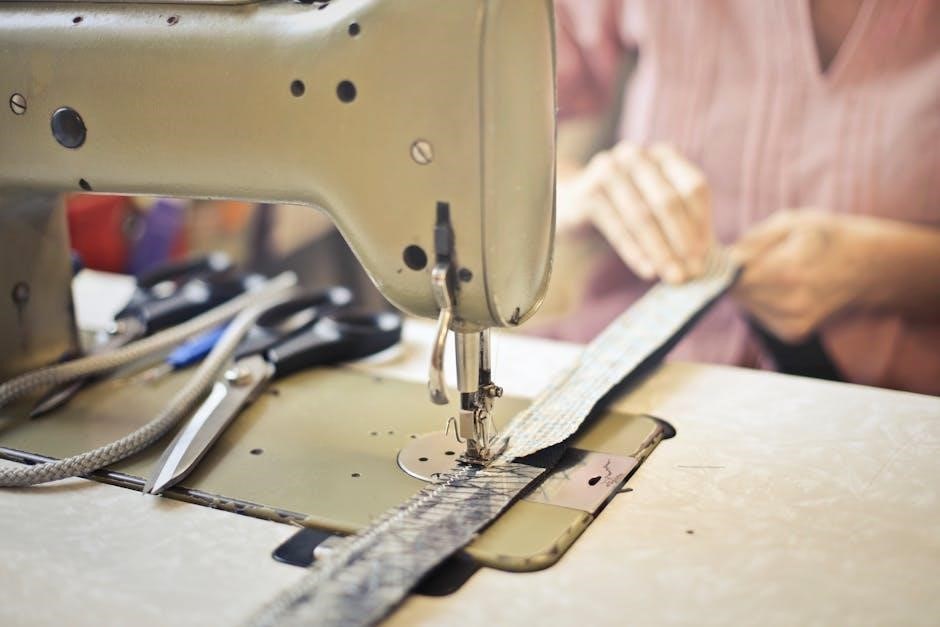
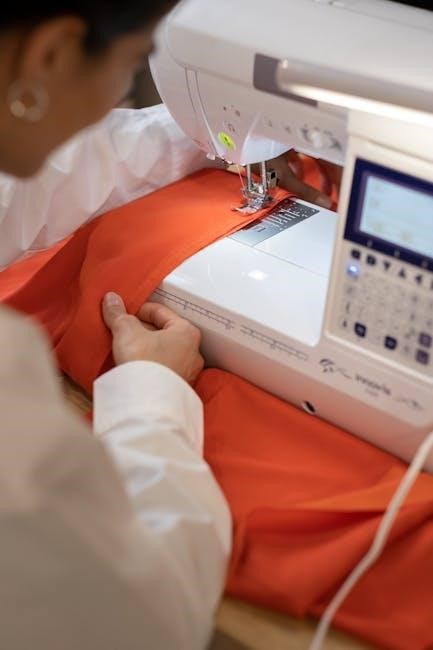
Threading the Singer 1120 sewing machine is a straightforward process. Begin by placing the spool of thread onto the spool pin. Gently pull the thread through the tension discs, ensuring it clicks into place. Guide the thread through the take-up lever and then down to the needle. Use the built-in needle threader to simplify this step. Pull the thread gently to remove any slack and ensure it is properly seated. Avoid over-tightening, as this can cause stitching issues. Proper threading is essential for smooth operation and consistent stitch quality. Refer to the manual for visual guidance if needed.
Installing the Bobbin
Installing the bobbin in the Singer 1120 sewing machine is a simple process. Lift the presser foot and locate the bobbin case under the machine. Place the bobbin into the case, ensuring the thread unwinds counterclockwise. Gently pull the thread to secure it in the tension spring. Close the bobbin case and guide the thread through the machine’s tension system. Lower the presser foot and test the thread by sewing a few stitches. Proper bobbin installation ensures smooth stitching and prevents thread jams. Always refer to the manual for specific guidance if needed.
Operating the Singer 1120 Sewing Machine
To install the bobbin, lift the presser foot and locate the bobbin case under the machine. Place the bobbin inside, ensuring the thread unwinds counterclockwise. Pull the thread gently to secure it in the tension spring. Close the bobbin case and guide the thread through the machine’s tension system. Lower the presser foot and test by sewing a few stitches. Proper installation ensures smooth stitching and prevents jams. Refer to the manual for specific guidance if needed.
Basic Sewing Techniques
Mastering basic sewing techniques on the Singer 1120 ensures smooth and professional results. Start by threading the machine correctly and selecting the appropriate stitch for your fabric type. For straight stitching, align the fabric edge with the machine’s guide. Gently guide the fabric under the presser foot, maintaining consistent tension. Use the handwheel to assist if needed. Backstitch at the beginning and end of seams for durability. Experiment with the 10 built-in stitches for different effects, such as decorative edging or stretch stitching. Always test stitches on scrap fabric before sewing your final project. Refer to the manual for stitch charts and settings.
Using the Built-in Stitches
The Singer 1120 offers 10 built-in stitches, including straight, zigzag, and decorative options, to cater to various sewing needs. To use a stitch, simply turn the stitch selection dial to the desired pattern. Refer to the stitch chart in the manual for guidance. For straight stitching, use the default setting, while zigzag is ideal for stretchy fabrics. Decorative stitches add a creative touch to your projects. Always test the stitch on scrap fabric before sewing your final piece to ensure proper tension and alignment; This feature allows you to explore a variety of techniques, from basic repairs to intricate designs.
Creating Buttonholes
Creating buttonholes on the Singer 1120 is simplified with its automatic 4-step buttonhole function. Select the buttonhole stitch and place your fabric under the needle, aligning the buttonhole foot. Start the machine, and it will sew a perfect buttonhole in four easy steps. For consistent results, use stabilizing material like interfacing beneath the fabric. The machine’s built-in feature ensures uniform size and precise stitching. Follow the manual’s guidance for adjusting length and width to suit your project needs. This feature saves time and effort, making it easy to add professional-looking buttonholes to shirts, jackets, and more.
Maintenance and Care
Regular maintenance ensures optimal performance. Clean the machine by removing lint and dust, then apply sewing machine oil to designated points as indicated in the manual.
Cleaning the Machine
Regular cleaning is essential to maintain the Singer 1120’s performance and longevity. Turn off and unplug the machine before cleaning. Use a soft brush or vacuum to remove lint and dust from the bobbin area, tension discs, and other crevices. Avoid harsh chemicals or liquids, as they may damage the machine’s finish or internal components. For stubborn lint, a small, dry cotton swab can be gently used. After cleaning, ensure all parts are dry and free of debris. Refer to the manual for specific guidance on cleaning sensitive areas to keep your machine running smoothly and reliably.
Oiling the Machine
Regular oiling is crucial to keep the Singer 1120 sewing machine running smoothly. Turn off and unplug the machine before oiling. Locate the oiling points as specified in the manual, typically near the bobbin area and other moving parts. Apply a few drops of high-quality sewing machine oil to these points. Gently turn the handwheel to distribute the oil evenly. Avoid over-oiling, as excess oil can attract dust and lint, potentially causing damage. Use only the recommended oil type to ensure optimal performance and longevity of your machine. Refer to the manual for exact oiling locations and frequency.
Replacing Parts
Replacing parts on your Singer 1120 sewing machine ensures optimal performance and prevents damage. Start by identifying worn or damaged components, such as needles, bobbins, or presser feet. Use only genuine Singer replacement parts to maintain quality and compatibility. Refer to the manual for specific instructions, as some parts may require special tools or techniques. Handle small components carefully to avoid losing them. After replacing a part, test the machine on a scrap fabric to ensure proper function. Regularly checking and replacing worn parts will extend the life of your machine and maintain sewing accuracy. Always follow safety precautions when handling sharp objects like needles.
Troubleshooting Common Issues
The Singer 1120 manual provides solutions for common problems, ensuring smooth operation. Refer to the manual for guidance on resolving issues and maintaining your machine effectively.
Thread Jamming Solutions
To resolve thread jams on your Singer 1120, start by turning off and unplugging the machine. Gently remove any tangled thread, taking care not to pull too hard. Use a seam ripper if necessary. Check the bobbin area for loose threads and ensure the bobbin is properly seated. Verify that the needle is correctly installed and that the thread path is clear. Regularly cleaning lint and debris from the machine can prevent jams. If issues persist, consult the manual for specific troubleshooting steps or consider professional servicing to maintain optimal performance.
Bobbins Not Picking Up Thread
If the bobbin isn’t picking up thread on your Singer 1120, first ensure it’s properly seated in the bobbin case. Check for correct orientation and alignment. Verify the thread is correctly threaded through the machine, following the path indicated in the manual. Adjust the top thread tension if it’s too tight, as this can prevent the bobbin from engaging. Clean the bobbin area and needle bar to remove lint and debris. Inspect the needle for damage and replace if necessary. Also, check the bobbin case and hook assembly for proper function. If issues persist, consult the manual or consider professional servicing.
Machine Not Turning On
If the Singer 1120 sewing machine fails to turn on, start by checking the power source. Ensure the machine is properly plugged into a functioning electrical outlet. Verify that the power cord is undamaged and securely connected to both the machine and the outlet. Check for blown fuses or tripped circuit breakers in your home’s electrical panel and reset or replace them as needed. Inspect the power switch for proper function and ensure it’s clean and free from debris. If the issue persists, consult the manual or contact a professional for assistance, as internal electrical components may require expert attention.
Advanced Features and Techniques
The Singer 1120 offers optional accessories, customizable stitches, and fabric-specific settings, enabling users to explore advanced sewing techniques and expand their creative possibilities beyond basic sewing tasks.
Using Optional Accessories
The Singer 1120 sewing machine supports a variety of optional accessories to enhance your sewing experience. These include specialized presser feet for tasks like zigzag stitching, buttonholes, and zipper installation. Additional accessories such as extra bobbins, needles, and sewing machine belts can also be used to expand the machine’s capabilities. Optional feet like the blind hem foot or overlock foot allow for more precise stitching on specific fabrics. Always refer to the manual for compatibility and installation instructions to ensure optimal performance. These accessories can help you tackle a wider range of projects with ease and precision.
Customizing Stitches
The Singer 1120 sewing machine offers 22 built-in stitches, allowing you to customize your projects with ease. You can select from essential, stretch, and decorative stitches to suit your needs. Adjust the stitch length and width to achieve the desired effect for various fabrics. The machine also features an automatic 4-step buttonhole function, enabling you to create customized buttonholes effortlessly; For added creativity, experiment with combining different stitch patterns to create unique designs. Refer to the manual for guidance on adjusting settings and exploring the full range of stitch customization options available on your Singer 1120 sewing machine.
Handling Different Fabric Types
The Singer 1120 sewing machine is versatile and can handle a variety of fabrics, from delicate silk to heavy denim. For lightweight fabrics like cotton or linen, use a sharp needle and adjust the stitch length and width for smooth stitching. When working with stretchy fabrics, such as knits, select the stretch stitch option to ensure flexibility. For thicker materials, like denim or canvas, use a heavy-duty needle and increase the tension slightly. Always test settings on scrap fabric before starting your project to ensure optimal results. Refer to the manual for specific recommendations on handling different fabric types effectively.
The Singer 1120 sewing machine manual provides comprehensive guidance for mastering your sewing projects. With its detailed instructions, you can confidently create professional-quality results and explore endless creative possibilities.
Final Tips for Maximizing Your Singer 1120
To get the most out of your Singer 1120, always refer to the manual for specific guidance. Regularly clean and oil the machine to maintain smooth operation. Explore all built-in stitches to enhance your projects, and practice using the automatic buttonhole feature for professional finishes. For optimal results, use high-quality threads and compatible fabrics. Keep essential accessories like bobbins and needles organized. Experiment with different techniques and fabrics to expand your sewing skills. By following these tips, you’ll ensure your Singer 1120 remains a reliable and versatile tool for years of creative sewing.
Encouragement to Explore Further Projects
With your Singer 1120, the possibilities for creative sewing are endless. Encourage yourself to experiment with new fabrics, stitches, and techniques to expand your sewing skills. Start with simple projects like pillowcases or curtains, then gradually move to more complex tasks like tailoring or embroidery. The machine’s built-in stitches and automatic features make it easy to transition between different types of sewing. Don’t hesitate to explore optional accessories, as they can enhance your sewing experience. Remember, every project is an opportunity to learn and grow, so embrace challenges and enjoy the journey of creating something truly unique.