Welcome to the comprehensive guide for vintage Singer sewing machines․ This manual provides essential instructions for understanding, maintaining, and troubleshooting your classic machine, ensuring optimal performance for years to come․
Overview of the Singer Sewing Machine Models
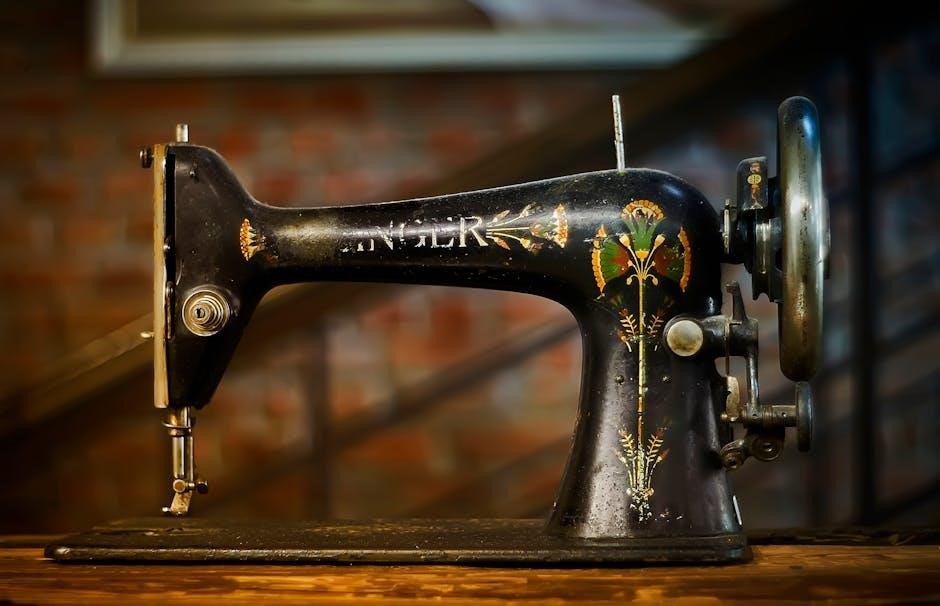
Singer sewing machines are renowned for their durability and versatility, with models like the 99, 99K, and 66k being particularly popular among vintage enthusiasts․ These machines, often dating back to the early 20th century, were built to last, featuring robust construction and precise mechanical engineering․ Available in both hand-crank and electric versions, they catered to various sewing needs, from basic repairs to intricate stitching․ Their timeless design and reliability have made them cherished by collectors and sewists alike for generations․
Importance of Using the Correct Manual for Your Machine
Using the correct manual for your Singer sewing machine is crucial for optimal performance and safety․ Manuals provide specific instructions tailored to your model, ensuring proper operation, maintenance, and troubleshooting․ Incorrect usage can lead to machine damage or accidents․ By following the right guide, you can maintain your machine’s longevity, achieve precise stitching, and handle repairs effectively․ Always download manuals from trusted sources like Ismacs or official Singer websites for accuracy and reliability․
Understanding Your Vintage Singer Sewing Machine
Understanding your vintage Singer sewing machine involves identifying its model, recognizing its unique features, and learning proper maintenance․ Refer to your manual for detailed guidance and care tips․
Identifying Your Singer Sewing Machine Model
To identify your Singer sewing machine model, locate the serial number or model number, typically found on the base or near the handwheel․ Models like the Singer 99 and 99K, built in 1950, are popular vintage models․ The Singer 99K features numbered tension and stitch length controls, while the 66k is another sought-after model․ Check for unique features like hand crank or electric operation to determine your machine’s specific type․ Visit Ismacs․net for detailed model identification guides and manuals․
Key Features of the Singer Class 99 and 99K Models
The Singer Class 99 and 99K models, built in 1950, are renowned for their durability and versatility․ The 99K features numbered tension and stitch length controls, simplifying operation․ These machines are available in both hand crank and electric versions, catering to different user preferences․ They are compatible with various attachments, making them suitable for a wide range of sewing tasks․ Their robust construction and timeless design have made them favorites among sewing enthusiasts and collectors alike․
Differences Between Hand Crank and Electric Models
The Singer Class 99 and 99K models are available in both hand crank and electric versions․ The hand crank model offers portability and manual control, ideal for small projects or areas without electricity․ The electric model provides faster stitching and reduced effort, suitable for heavy-duty tasks․ Both versions share the same mechanical reliability and compatibility with attachments, making them versatile for various sewing needs․ Choose based on your preference for manual or powered operation․ Both are popular among collectors and sewists alike․
Setting Up Your Old Singer Sewing Machine
Unpack and prepare your machine, ensuring all parts are included․ Assemble if necessary, then position it on a stable surface for optimal sewing experience․
Unpacking and Preparing the Machine
Carefully unpack your vintage Singer sewing machine, inspecting for any damage or missing parts․ Gently remove packaging materials and clean the exterior with a soft cloth․ Apply a small amount of Singer oil to moving parts to ensure smooth operation․ Check the needle, bobbin, and tension discs for proper alignment․ Before use, verify all accessories are included and functional․ This preparation ensures your machine is ready for optimal performance․
- Inspect for damage or missing components․
- Clean the machine with a soft, dry cloth․
- Lubricate moving parts with Singer oil․
- Ensure all accessories are accounted for and functional․
Consult your manual for specific instructions tailored to your model․
Assembling the Machine (if necessary)
For Singer 99K and 66K models, assembly may involve attaching the balance wheel or fitting the needle bar․ Ensure all screws are tightened securely but avoid over-tightening․ Refer to your manual for specific instructions, as assembly steps vary by model․ Handle delicate parts with care to prevent damage․ Once assembled, test the machine at a slow speed to ensure proper alignment and smooth operation․
- Attach the balance wheel and needle bar if required․
- Tighten screws gently to avoid stripping threads․
- Consult your manual for model-specific assembly guidance․
- Test the machine at low speed after assembly․
Ensure all parts are correctly aligned before first use․
Positioning the Machine for Optimal Use
Place your vintage Singer sewing machine on a stable, flat surface to ensure smooth operation․ Position it at a comfortable height, approximately waist level, to avoid strain․ Ensure the machine is securely placed to prevent vibration․ For hand-crank models, face the balance wheel for easy access․ Keep the surrounding area clear for fabric movement and maintain good lighting for visibility․ Proper positioning enhances control and sewing accuracy․
- Stable, flat surface for reduced vibration․
- Comfortable height to avoid strain․
- Clear workspace for fabric movement․
- Face the balance wheel on hand-crank models․
Thread Management and Tension
Proper thread management and tension are crucial for smooth stitching․ Use high-quality threads suitable for your fabric type and adjust tension as guided in the manual․
Ensure balanced tension to prevent loose or tight stitches, enhancing overall sewing quality and machine performance․
Understanding Thread Types and Uses
Choosing the right thread for your Singer sewing machine is vital for optimal performance․ Cotton, polyester, and silk threads are commonly used, each suited for specific fabrics․ Cotton threads are ideal for general sewing and natural fabrics, while polyester is durable for heavier materials․ Silk threads are perfect for delicate fabrics like silk or chiffon․ Heavy-duty threads are designed for thicker fabrics, such as denim or canvas․ Always select a thread that matches your fabric type to ensure smooth stitching and prevent breakage․ Consult your manual for recommendations on thread sizes and types compatible with your machine model․
Threading the Machine Correctly
To thread your Singer sewing machine, start by placing the thread spool on the spool pin․ Guide the thread through the tension discs, ensuring it is not too tight or loose․ Next, loop the thread around the take-up lever and pass it through the needle’s eye․ Leave a small slack for the bobbin․ Always use the correct thread type for your fabric, as specified in the manual, to ensure proper stitching and machine performance․ Proper threading is key to smooth operation․
Adjusting Tension for Proper Stitching
Proper thread tension is crucial for even stitching․ Begin by turning the take-up lever to adjust the upper thread tension․ For the lower thread, tighten or loosen the bobbin case screw․ Test stitches on scrap fabric; if the thread is too tight, reduce tension․ If too loose, increase it․ Ensure the bobbin is seated correctly and the machine is threaded properly․ Adjustments may vary depending on fabric type․ Always test stitches and make fine-tuned adjustments for perfect results․
Basic Sewing Operations
Discover the fundamentals of operating your vintage Singer sewing machine, including sewing straight lines, backtacking, and utilizing the reverse stitch function for secure seams with ease․
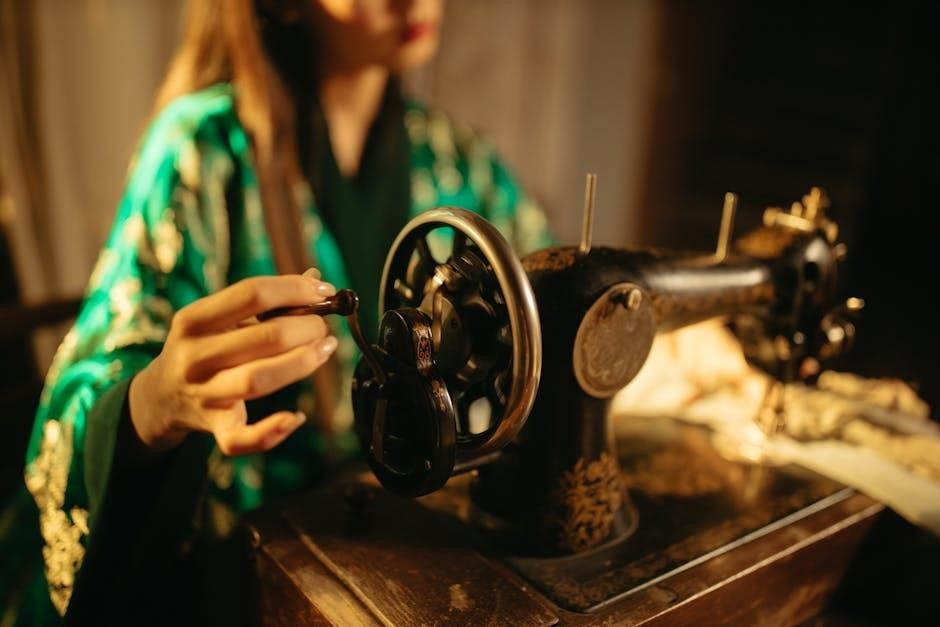
Starting and Stopping the Machine
For hand crank models, turn the hand wheel clockwise to start sewing․ Adjust stitch length via the dial․ Electric models use a motor; press the foot pedal gently․ Always ensure the needle is clear of fabric before starting․ To stop, release the pedal or halt the crank․ Keep fingers away from moving parts and use the proper needle plate for safety․ Regularly oil the machine for smooth operation and consistent stitch quality․
Sewing Straight Lines and Backtacking
To sew straight lines, guide fabric smoothly under the needle, keeping it aligned with the edge of the presser foot․ For backtacking, reverse the stitch direction at the start and end of seams to secure them․ On electric models, use the reverse stitch lever; on hand crank models, turn the hand wheel backward․ Ensure even tension and maintain a steady pace for consistent results․ Always test stitches on scrap fabric before sewing your final piece․
Using the Reverse Stitch Function
To use the reverse stitch function, locate the reverse stitch lever on electric models or turn the hand wheel backward on hand crank machines․ Engage the function at the beginning and end of seams to secure stitches․ This prevents unraveling and ensures durability․ For electric models, gently pull the lever down; for hand cranks, rotate the wheel counterclockwise․ Always test the function on scrap fabric to ensure proper operation before sewing your final project․
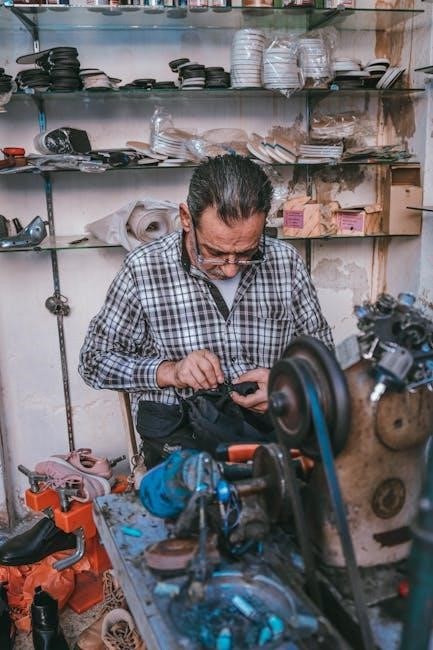
Maintenance and Care
Regular cleaning, oiling, and checking for worn parts ensure smooth operation․ Store the machine in a dry place, using a cover to protect from dust and moisture․
Cleaning the Machine Regularly
Regular cleaning is essential to maintain your vintage Singer sewing machine’s performance․ Use a soft, dry cloth to wipe away dust and debris from the exterior․ For internal parts, gently remove lint and thread remnants with a small brush․ Avoid harsh chemicals, as they may damage the finish․ Oil residue can be carefully wiped away with a clean cloth․ Regular maintenance ensures smooth operation and preserves the machine’s longevity․ Always unplug before cleaning and cover the machine to prevent dust buildup when not in use․
Oiling the Machine for Smooth Operation
Regular oiling is crucial for maintaining smooth operation of your vintage Singer sewing machine․ Use Singer-specific oil or high-quality sewing machine oil, applying a few drops to the moving parts as indicated in the manual․ Turn the hand wheel gently to distribute the oil evenly․ Avoid over-oiling, as it may attract dust and cause mechanical issues․ Clean away excess oil with a soft cloth to prevent residue buildup․ Proper lubrication ensures quiet, efficient stitching and extends the machine’s lifespan․
Troubleshooting Common Issues
If your Singer sewing machine encounters issues, start by checking the thread tension and ensuring proper threading․ Incorrect tension can cause bunching or uneven stitches․ Regularly clean out debris from the bobbin area and under the needle plate to prevent jams․ If the machine is noisy or sluggish, inspect for dust buildup and apply oil to moving parts․ For inconsistent stitching, verify that the needle is correctly installed and not bent․ Always refer to your manual for specific troubleshooting steps or seek professional assistance if problems persist․
Using Attachments and Accessories
Enhance your sewing experience with Singer’s variety of attachments and accessories․ From presser feet to specialized stitches, these tools expand your machine’s capabilities for zippers, hems, and embroidery․
Overview of Available Attachments
Explore a wide range of attachments designed for your vintage Singer sewing machine․ These include presser feet for zippers, hems, and buttonholes, as well as specialized tools for embroidery and quilting․ Additional accessories like tension disks, seam guides, and storage cases enhance functionality and organization․ These attachments are compatible with models such as the Singer 99k, 66k, and 201k, allowing you to expand your sewing capabilities and tackle various projects with precision and ease․
- Zipper and hemming feet for precise edge stitching․
- Buttonhole attachments for consistent, professional results․
- Embroidery hoops and decorative stitch plates for intricate designs․
- Quilting attachments for managing large fabrics effortlessly․
Installing and Using Different Presser Feet
Presser feet are essential for achieving professional results with your vintage Singer sewing machine․ To install, lift the presser foot lever, align the foot with the machine’s shank, and secure it firmly․ Use the zipper foot for precise edge stitching and the hemming foot for smooth fabric folding․ The buttonhole foot ensures perfect buttonholes, while specialized feet like the quilting or embroidery foot expand your creative possibilities․ Always refer to your machine’s manual for specific installation instructions․
- Zipper foot for seamless zippering․
- Hemming foot for even fabric folding․
- Buttonhole foot for consistent results․
Utilizing Special Stitches and Functions
Vintage Singer sewing machines, like the Class 99 and 99K, offer versatile stitching options․ Use the straight stitch for general sewing and backtacking for secure seams․ The reverse stitch function ensures strong stitching by sewing backward․ Adjust stitch length and tension using manual dials for precise control․ Explore decorative stitching techniques and specialized functions to enhance your sewing projects, ensuring professional-quality results with every stitch․
- Straight stitch for general sewing․
- Reverse stitch for reinforced seams․
- Adjustable stitch length and tension․
Restoring an Old Singer Sewing Machine
Restore your vintage Singer sewing machine to its former glory by cleaning, refurbishing, and replacing worn parts․ Follow detailed steps to ensure proper functionality and longevity․
Cleaning and Refurbishing the Exterior
Carefully clean the exterior using a soft cloth and mild detergent to remove dirt and grime․ Avoid harsh chemicals that may damage the finish․ Gently scrub stubborn stains and wipe dry thoroughly․ For metal parts, use a polishing compound to restore shine․ Pay special attention to intricate designs and decals․ Once clean, apply a light layer of sewing machine oil to protect the metal surfaces and maintain their condition․ This process ensures your vintage Singer machine looks and functions like new․
Replacing Worn or Damaged Parts
To restore your vintage Singer sewing machine, identify and replace worn or damaged parts using genuine Singer components for optimal compatibility․ Refer to your machine’s manual or online resources like Ismacs․net for specific part numbers and guidance․ Carefully remove the old parts, ensuring no further damage occurs․ Install the new components securely, following the manufacturer’s instructions․ Test the machine after replacement to ensure smooth operation and proper stitching․ This step is crucial for maintaining your machine’s performance and longevity․
Testing the Machine After Restoration
After restoration, test your Singer machine thoroughly to ensure all parts function correctly․ Start with a straight stitch on scrap fabric to check stitch quality and tension․ Verify that the machine runs smoothly, with no unusual noises or vibrations․ Test the reverse stitch, backtacking, and any special features․ Ensure all attachments and presser feet operate as intended․ If the machine hesitates or skips stitches, adjust the tension or needle alignment․ Proper testing ensures reliability and optimal performance for your vintage Singer sewing machine․

Safety Tips and Precautions
Always keep fingers away from moving parts and use the proper needle plate․ Handle needles with care to avoid injury․ Regularly inspect the machine for damage or wear․
General Safety Guidelines
Always keep fingers away from moving parts and use the correct needle plate․ Regularly inspect the machine for damage or wear․ Avoid loose clothing that could catch․ Ensure the work area is clear of clutter․ Never leave the machine unattended, especially near children․ Use the appropriate presser feet for each task․ Handle needles with care to prevent injury․ Unplug the machine when not in use or during maintenance․
Preventing Accidents While Sewing
Preventing accidents involves careful handling and awareness while sewing․ Keep loose clothing tied back and long hair secured․ Avoid wearing jewelry that could snag fabric or get caught in moving parts․ Ensure the sewing area is well-lit to prevent eye strain․ Use the correct presser feet for each fabric type to maintain control․ Keep children and pets away from the machine while it is in operation․ Never touch the needle or presser foot while the machine is running․ Always use the provided accessories and attachments as directed to avoid mishaps․ Regular maintenance, such as oiling and cleaning, is essential to ensure smooth operation and prevent mechanical failures that could lead to accidents․ By following these guidelines, you can create a safe and efficient sewing environment․ Always unplug the machine when not in use or during maintenance to eliminate any risk of unexpected startups․ Stay alert and focused while sewing to prevent accidents and achieve professional results․ Using the correct needle size and type for your fabric can also prevent breakage and potential injury․ Proper storage of the machine when not in use, such as in a dry place away from direct sunlight, can help maintain its condition and prevent accidental damage․ Additionally, familiarize yourself with the machine’s parts and functions before starting any project to ensure safe and effective operation․ Lastly, never attempt to sew while tired or under the influence of substances that could impair your judgment or coordination․ Sewing is a rewarding hobby, but safety should always be your top priority to enjoy it for years to come․ By adhering to these preventive measures, you can minimize risks and maximize your sewing experience․ Always refer to your manual for specific safety recommendations tailored to your Singer model․ Stay informed and proactive to maintain a safe and productive sewing environment․ Happy sewing!
Proper Storage and Handling
Proper storage and handling are crucial for maintaining your vintage Singer sewing machine․ Always store it in a dry, cool place away from direct sunlight to prevent rust and damage․ Use a protective cover or case to shield it from dust․ Avoid storing it in attics, basements, or humid environments․ Clean the machine thoroughly before storage to prevent dirt buildup․ When moving the machine, lift it carefully to avoid damage to its internal mechanisms․ Never drag or drop the machine, as this can cause irreversible harm․ Store it in its original case if possible for added protection․ Regularly inspect the machine during storage to ensure it remains in good condition․ Proper handling ensures your Singer sewing machine remains functional and preserved for future use․ Always keep it out of reach of children to prevent accidental damage․ By following these storage and handling tips, you can extend the life of your vintage Singer sewing machine and maintain its operational integrity․ Regular maintenance and care during storage are key to preserving its value and performance․ Ensure the machine is stored upright to prevent oil from leaking or settling unevenly․ Avoid exposure to extreme temperatures, as this can affect the machine’s lubrication and mechanical parts․ Proper storage and handling are essential for safeguarding your investment in this timeless sewing companion․ Always prioritize careful handling to protect your Singer sewing machine from unnecessary wear and tear․ By doing so, you can enjoy sewing with it for many years to come․
Additional Resources
Find manuals for vintage Singer machines on Ismacs․net or ManualsOnline․ Join sewing communities for support and tips; Explore the Smithsonian’s archive for historical machine documents and guides․
Downloading or Purchasing Manuals Online
Access manuals for vintage Singer machines via websites like Ismacs․net or ManualsOnline․ These platforms offer free or paid downloads for models like the Singer 99K, 66K, and 201K․ Ensure the manual matches your machine’s model for accuracy․ Many reproductions include detailed instructions, parts lists, and troubleshooting tips․ For rare models, consider purchasing from trusted sellers or historical archives like the Smithsonian’s collection․ Always verify the manual’s authenticity before downloading or purchasing․
Online Communities and Forums for Support
Join online forums and communities dedicated to vintage Singer sewing machines for expert advice and shared experiences․ Websites like Ismacs․net and sewing enthusiast groups on Facebook offer valuable resources, troubleshooting tips, and restoration guidance․ These platforms connect you with passionate collectors and experienced sewists, providing real-time support and inspiration for your projects․ Engage with these communities to enhance your understanding and enjoyment of your classic Singer machine․
Recommended Tools and Supplies
Essential tools for maintaining your vintage Singer sewing machine include screwdrivers, oil cans, and cleaning brushes․ Genuine Singer oil and replacement parts, like needles and belts, are crucial for smooth operation․ Consider investing in a reproduction manual for specific guidance․ Online retailers and sewing communities often offer these supplies, ensuring your machine remains functional and well-maintained for years of reliable use․
Congratulations on completing the manual! Your vintage Singer machine is now ready to create beautiful projects․ Enjoy sewing with a piece of history․
Final Tips for Enjoying Your Vintage Singer Sewing Machine
Regularly maintain your machine by cleaning and oiling it to ensure smooth operation․ Explore creative projects, from repairing clothes to crafting home decor․ Join sewing communities for inspiration and support․ Remember, patience and practice will enhance your sewing skills․ Embrace the charm of working with a vintage machine—it’s a timeless tool for creating something truly special․ Happy sewing!
Encouragement to Explore Further Projects
With your vintage Singer sewing machine, the possibilities are endless! From creating custom clothing to crafting home decor, embrace the joy of sewing․ Experiment with different fabrics and techniques to expand your skills․ Join online communities for inspiration and share your creations․ Remember, every stitch tells a story, and your machine is a timeless companion for all your sewing adventures․ Keep exploring and enjoy the satisfaction of handmade craftsmanship!